Monday 28 November 2011

Monday 3 October 2011

Tutorial 14 - Stipey Cardigan with Bustle Back

Tutorial 14
Stripy Cardigan with bustle back

Look....... at this amazing cardigan made from 2 cardigans.

One that fits you and one to use for the fabric.

Combining 2 finished garments together, is a great easy way to create your own individual cardigan whilst keeping the professional finished look.
You need 2 classic V or crew neck cardigans.

I've used 2 stripey cardigans from Portobello £15 each but you can use any plain ones. 
1.   Using an unpicker or little scissors unpick the ribbing on the main cardigan.
It should look like the above picture. I stopped half an inch beyond the ribbing.
Cut out an arch shape, the centre height should be about 6ins.

Remember to keep this piece that you have cut out as you'll be using the ribbing later.
Fold over and make a notch (a little snip) to show centre back.
Then open out and do 2 more notches 6ins apart, to show where to gather.
Using biggest stitch on your sewing machine, gather between those 2 notches.
2.   Now........get the other cardigan, that you are using as fabric.

Cut right along just under the arms so you end up with a rectangle. (see above picture)
Measure how long the arch is on the main cardigan.

That's how long your rectangle needs to be.

Mine was too long so I'm cutting a section out of the middle (don't just cut it off from the end as you want to keep the edges with buttons and button holes.)
Stitch right sides together and don't forget to zig zag edges.
Open out and press.
Then fold over and put a notch to mark the centre.
3.  Using the arch piece left over from part 1. cut half an inch above the ribbing so you end up with a long strip. Then fold and make a notch to show the centre.

Really stretch this using a steam iron on the ironing board.
Then starting with your centre notches together, with the ribbing (right side facing up) start sewing out towards the edge.

Do the same on the otherside.
Now you can treat this as 1 piece.
Get some Bond a Web and cut into 1-2mm strips.

Big Tip: Don't bother using pins use thinly cut stips of Bond a Web instead and glue into place 1st with an iron and then it's a dream to sew.
This is how your cardigan looks when layed out upside down.

Take to the ironing board and start bonding the  rectangle into position, carefully working your way round.
Starting is so important.

Line up the edge of the ribbing with the edge with the buttons and buttonholes on exactly, before bonding into place. Then only bond till you get to the start of the gathering on the back.

Then start on the other side and do the same.

Now you can ease the gathering to fit exactly then bond into place. (might need to loosen or pull gathering threads to make fit.)
Now that everything is bonded into place, have a little check in the mirror.........if all is ok, see what a dream it is to sew.
Don't forget to zig zag your raw edges and make sure you press well.
And they should look something like this!
The great thing about this tutorial is with a little imagination you can apply it to so many things maybe a jacket?

Look out for my Kagoole Jacket Tutorial where I use a similar technique.

Tuesday 20 September 2011

Tutorial 13 - Upstyle Cardigan with Silk Frill Peplum

Tutorial 13
Upstyle Cardigan with Silk Frill Peplum
This Upstyle project is really versatile.
Here I used a scarf for the frill peplum but it can be any fabric.
Using a plain silk the same colour as the cardigan can give a more subtle look. 
You will need a classic cardigan this one is from UNI QLO was £15 and I used a scarf (34ins square) which was £5 from Portobello Market.
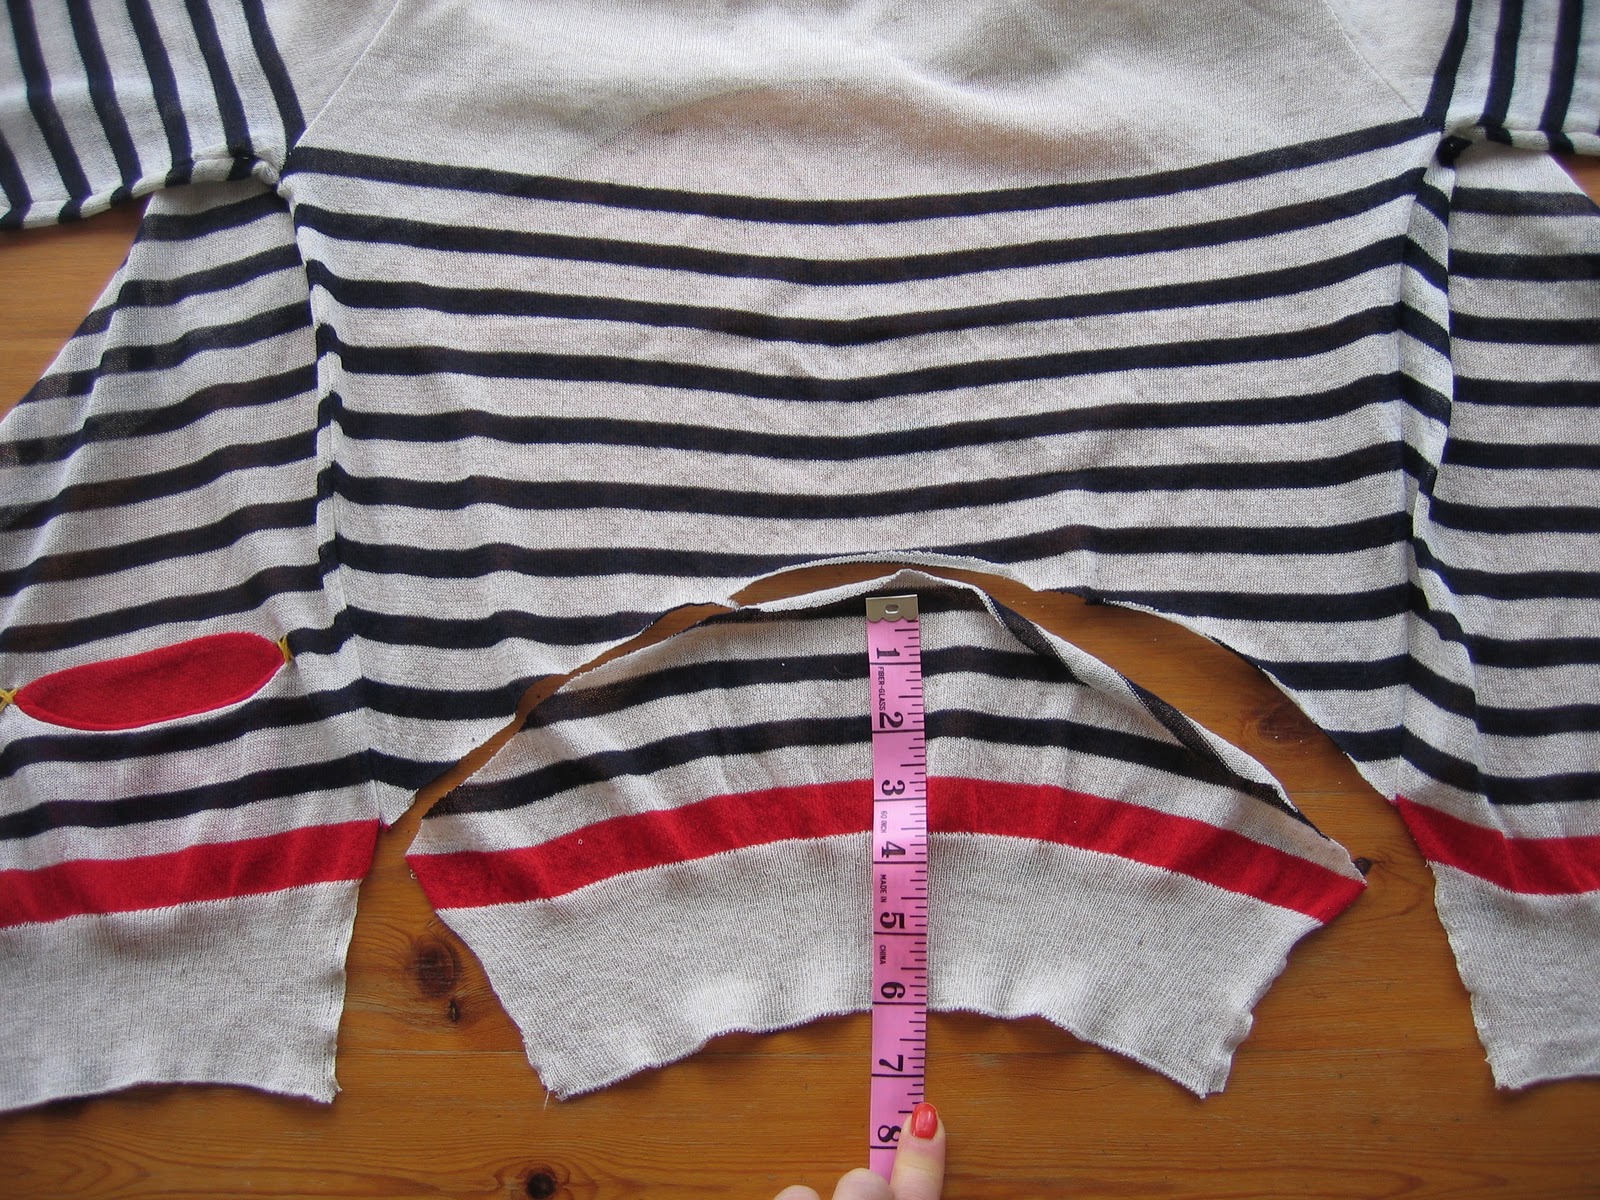
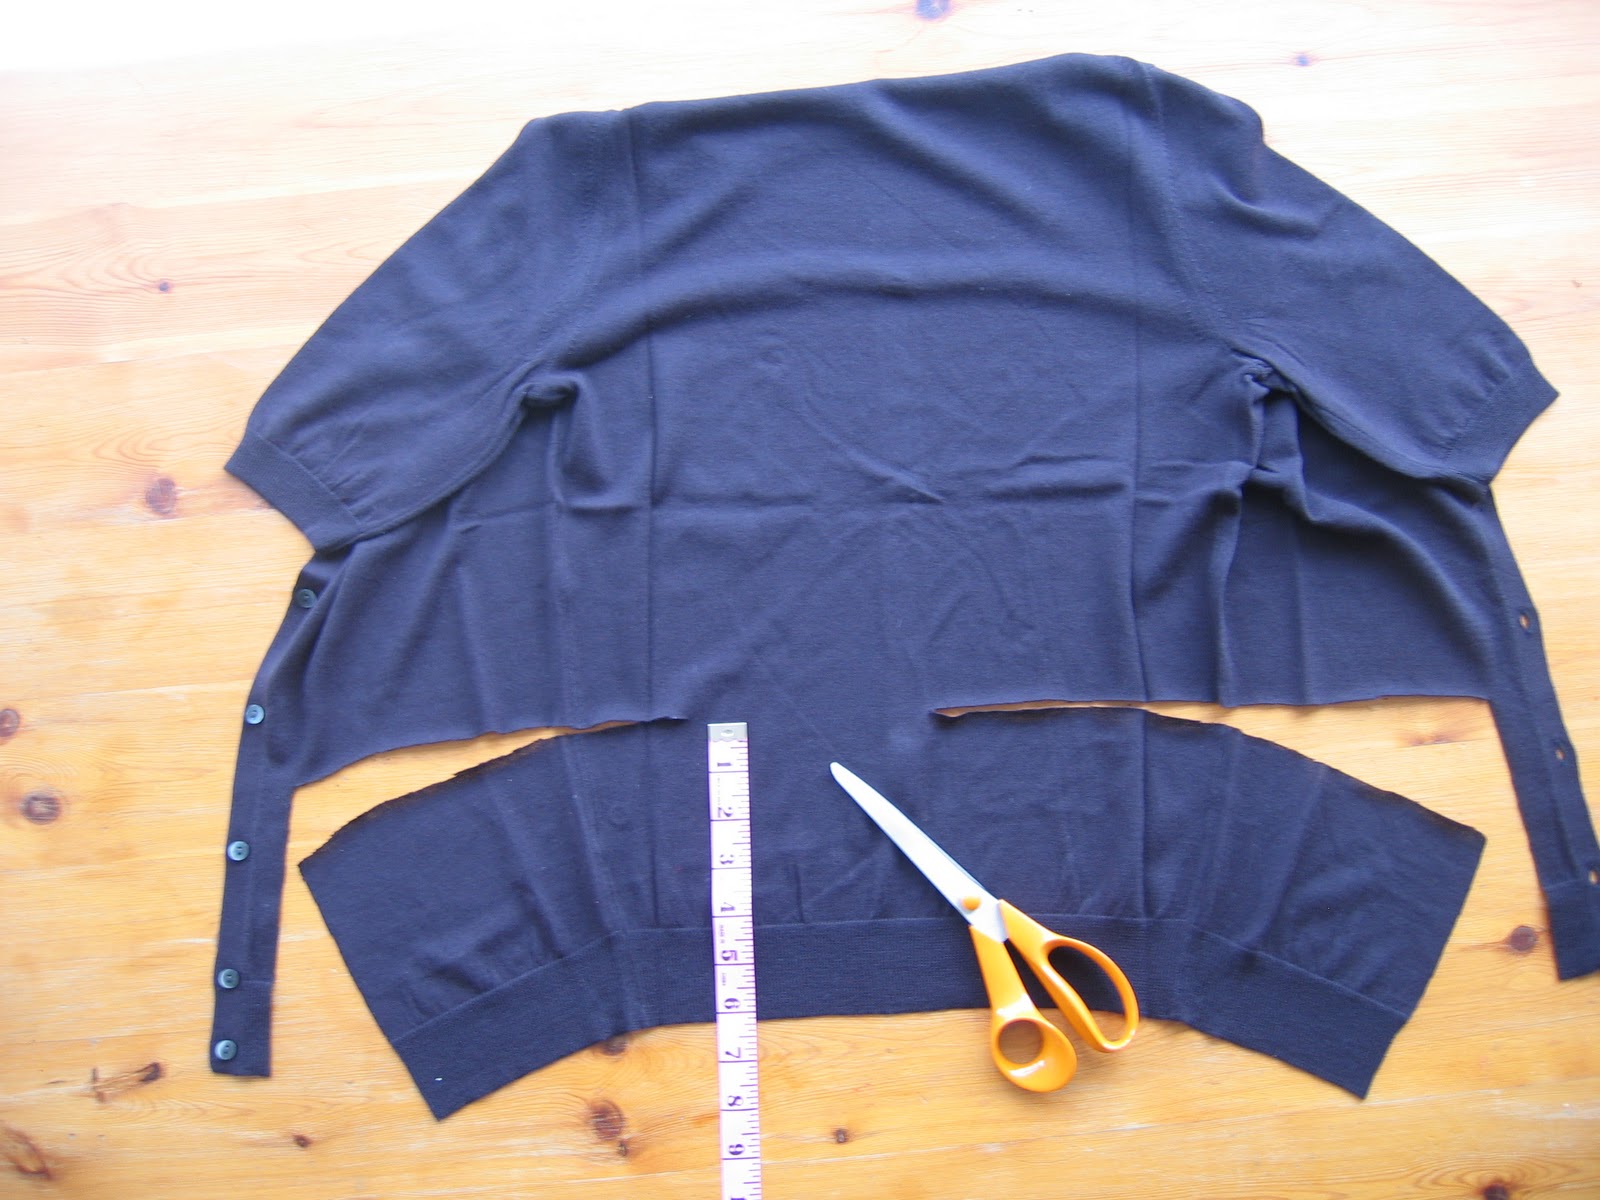
1.  Keeping the buttons and button holes, cut 6ins up along centre front leaving 1/2 inch seam allowance.
Then cut along until you have cut a section out that is 6ins wide. Keep this as ribbing is very useful for loads of other tutorials.
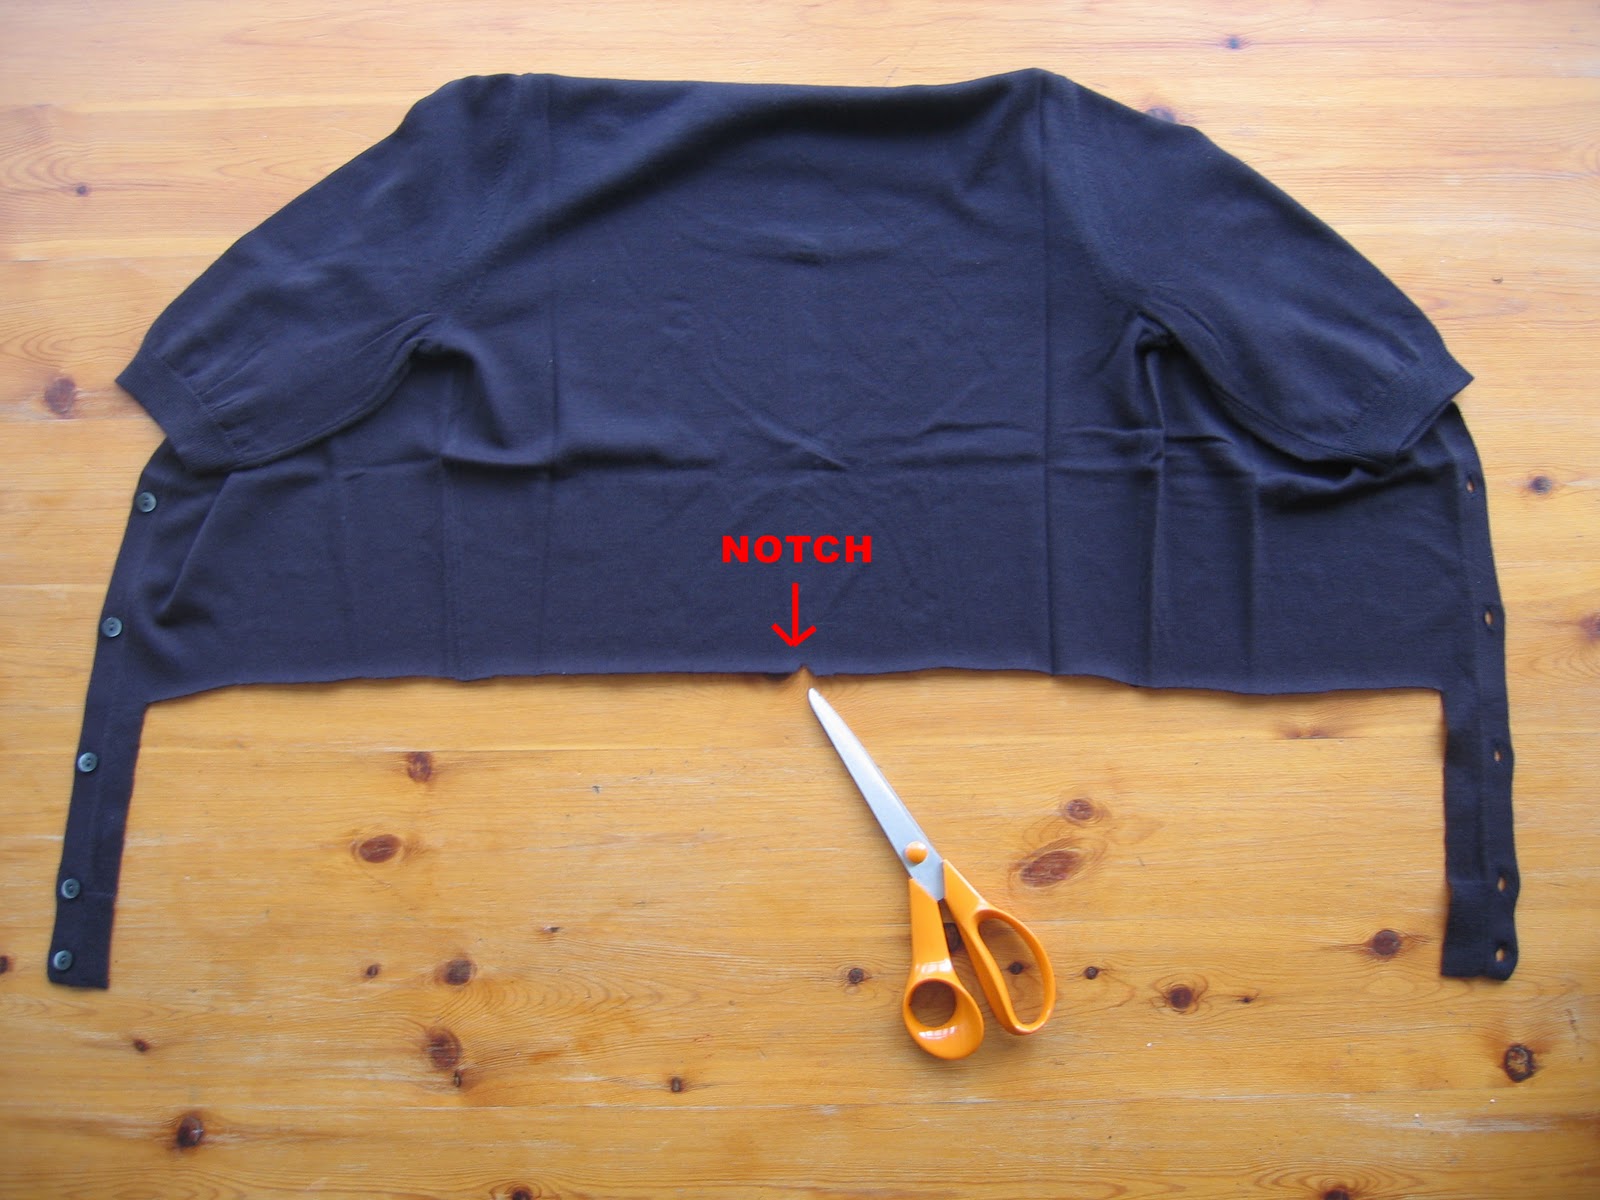
Find the centre front by folding the cardigan in half and making a little nip in the fold. When you open it out it should look like this.
2.   Get the scarf and cut 2 strips 7ins each (this allows for extra seam allowance)
Put them right sides together and seam one seam
Then press open
 Gather using largest straight stitch on your sewing machine and pulling a bottom thread till it roughly looks like it will fit the space in the cardigan
3.   Make 2 more notches equidistant apart from centre back notch.
Fold where the 1st notch is and make a dart by sewing at an angle from the edge coming in about 4ins long. Click on above picture to make larger.
Then do the same on the other side, press with a steam iron and it should look like this.
4.  Now, put the cardigan on the ironing board and get a long piece of Bond a Web cut to 1-2mm wide, position it just on the edge of where you're going to add the gathered frill.
Place the frill, right sides together, onto the Bond a Web, (as seen in picture) starting 1 inch in, for seam allowance. And begin working your way along pressing into place as you go and adjusting the gathering to fit as you go.

Remember to leave the same seam allowance 1inch at the end.
When you are happy that it is glued in the right place, you can begin sewing.
Start 1/2 inch before, where my finger is in the picture.
Then do a little diagonal snip from the edge to the beginning of the stitch line.
Do the same on the other side. This is done to allow movement in the fabric so that you can turn the frill fabric and stitch down the centre front.
Just like this.
You may need to ease the knitted cardigan fabric to fit as you go, this can then be pressed out.
Press back and zig zag all the edges.
I usually give a little snip to mitre the seams where they meet the hem before I zig zag.
Close up of pressed front
Should look something like this when laid out.

Once you have mastered this this possibilities are endless, that space that you cut out of the cardigan can be filled with anything.

Chiffon, lace, silk, rough linen it's up to you, make your own unique version
I even had a little bit left to make a neck scarf.

Search This Blog

About Me

Seamless with Shaz and Tree will show you how to make one-off, fashionable clothes easily. With Upcycling, sewing shortcuts and step by step tutorials. We'll also be doing trips out to our favourite suppliers and markets. We'll give you the tools to create you very own designer clothes

Followers