Wednesday 20 October 2010

Trip to Haberdashery Shop

Trip to Haberdashery Shop

I've been going to Barnet Lawson, 16/17 Little Portland St, nr Oxford Circus for years.

When you get there, search through the list of businesses, when you see Barnett Lawson ring buzzer and they'll let you in.
It really is an Aladdin's cave of buttons, braiding's, lace, feathers etc. all at trade prices but also available to the public.


They have 3 sections with floor to ceiling shelving units full of boxes of goodies.


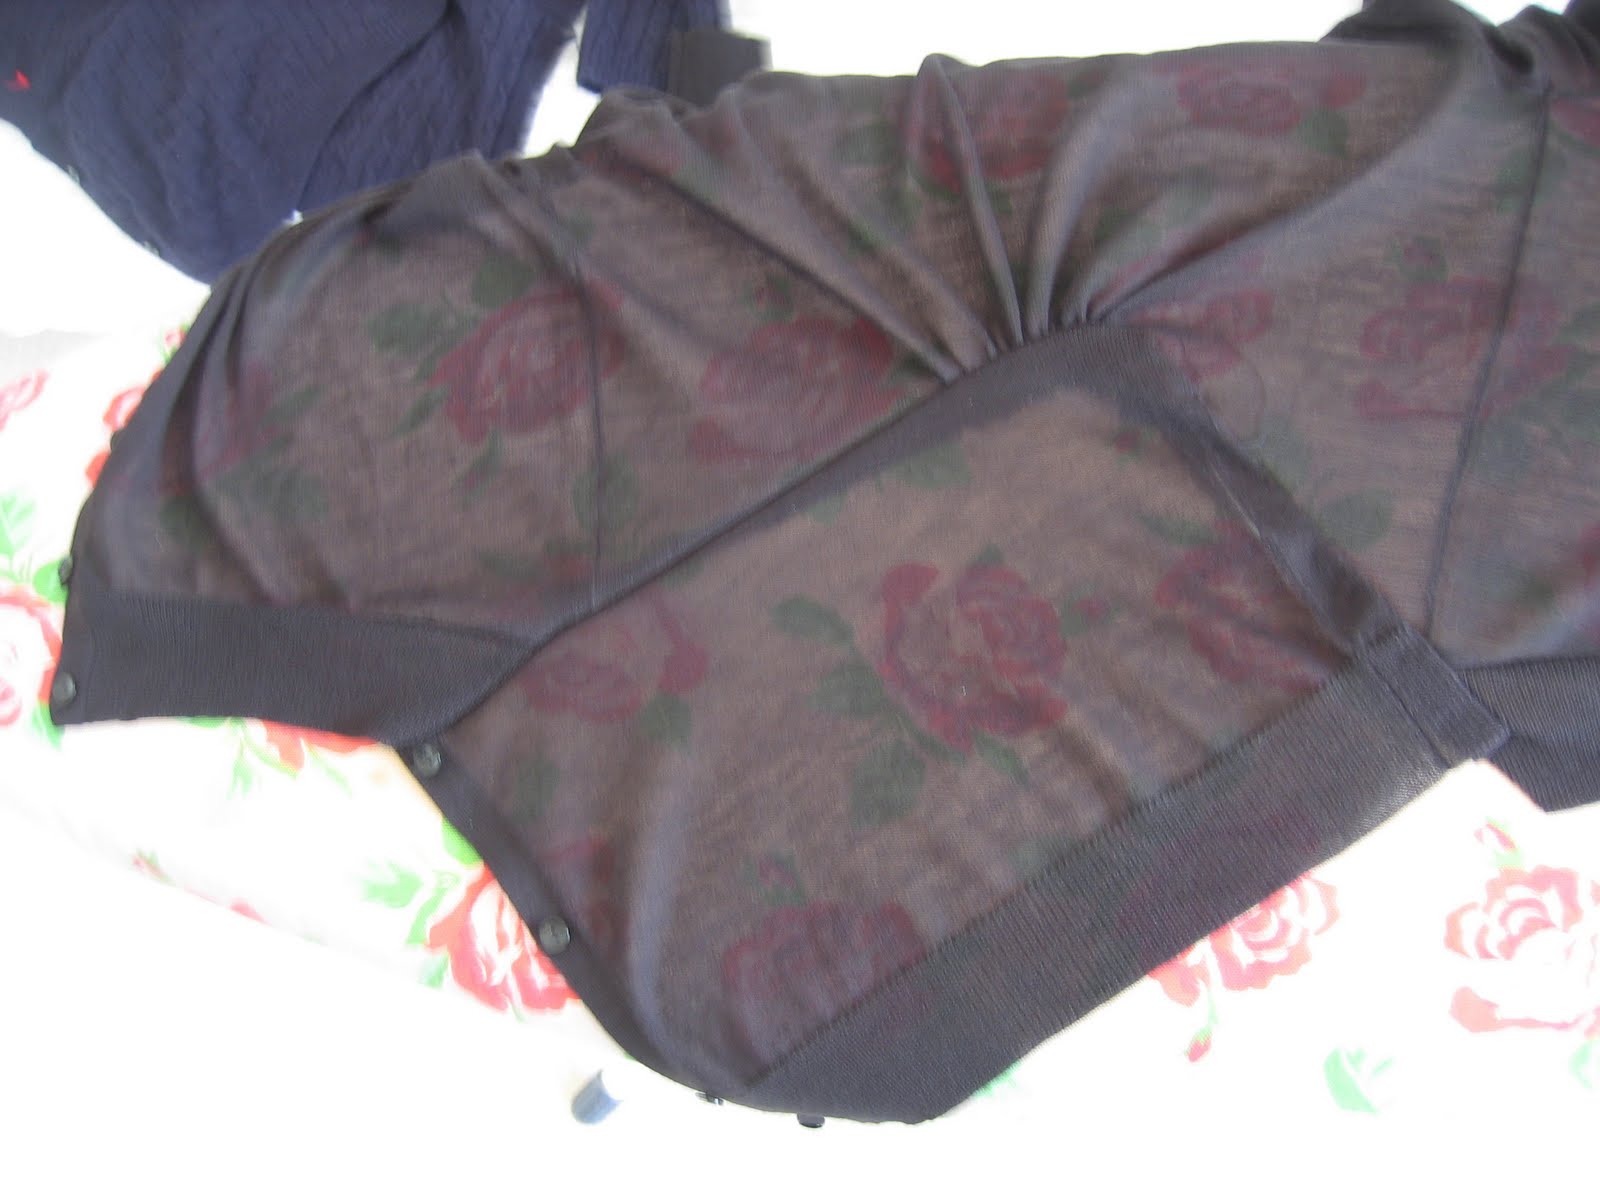
These pieces are silk frills with ready made button openings. They are a bit pricey at £14 + VAT per mtr but you could get away with buying 30cms (ie.about £4.50 + vat)and using them to create an opening in a top, which would save you loads of time.

The metalic lace in above picture is between £1.25 and £1.75 per mtr and is 5cms wide.


Can't be bothered to make your own pom poms then they had these in all shapes and sizes. the price was something like £6 + VAT for 10 med pom poms.

Don't bother going to their website, as it has hardly any of the stock that's there and is not a good representation of what they do.

Have fun!


Wednesday 11 August 2010

Tutorial 6 - Sew Black Cardigan with Tails

Tutorial 6
Black Cardigan with Tails

FRONT VIEW
Make this fantastic 'Cardigan with Tails' from using 2 plain 'Uni Qlo' V necked Cardigans.


 BACK VIEW
Imagine the possibilities with this great cardigan, I've used a thin cotton mix UNI QLOcardigan but it works equally well with thicker wools. You can make a longer version so it's more like a frock coat cardigan. So long as you keep to the rule of buying 2 cardigans made of the same fabric one to fit you and one much bigger to use for the fabric.

It has this beautiful arched backseam with long tails gatered into it. Get 2 plain V neck cardigans, one in your size and one in the biggest size you can get as you'll be using this one just for the fabric.
1. Lay the cardigan that is your size out on the floor and cut 1cm above the ribbing all along the front and down the side seams.

Sorry if you can't see very well, but you should end up with two strips of ribbing like these. Remember to remove buttons that will get in the way of sewing, they can be stitched back on later.

2. Then using the same cardigan, decide how long you want the cardigan to be, allowing also for ribbing that will be added later and then shape the front.

Remember to remove any buttons that will be in the way of applying the ribbing.
Once you've done that, lift back the front a bit so you can see the back and using the front as a guide, cut an arch in the back.

3. Fold the cardigan down centre back and notch on the fold and 2inches away on the arch.

Using the largest straight stitch on your machine, gather between the notches.

When off the machine you can pull the thread underneath to gather more or less.


I know it's a bad picture, but it should look like this, you can make it more or less gathered according to your taste.

4. Make sure you position the centre front band correctly before sewing and line it up to fit with a little stretch to the side seams.

Stretch the ribbing as you sew it on.

This is how it should look at this stage.

5. Using your second spare oversized cardigan cut a piece all the way across, in this case 23cms from the hem. Unbutton and open out to cut down the centre back, leaving you with 2 halves.
Trim back hem to ensure you have a good shaped arch.

6. Work out how long it needs to be to reach across and hang flat, then cut off excess allowing for a seam allowance.

Then right sides of fabric together stitch from centre back down one side of arch, then stitch down the other side which may not reach all the way to the hemline.
When you've completed one tail, get ready to apply the second one on the opposite side in the same way.


7. Close - up of tails inside out, shows that if you are happy with the position, you must zig zag seam allowance to finish off.

CLOSE - UP OF TAILS

BACK

FRONT

You've completed this great Cardigan with Tails.You can change the look depending upon the position of the arch at the back for the tails.

Sunday 1 August 2010

Handmade, beaded, leather kids pumps £5 each.


These are the handmade, leather, beaded kids pumps that I was telling you about in the 'Trip to Southall' posting. They're only £5 each, adults are £10. They also had some interesting beaded clutch bags for peanuts.

Trip to Southall

If you can't afford to go on holiday this year... hey why not go to Southall.


**** I LOVE SOUTHALL****
All the sights and sounds are really like being in a totally different country and throw in a bit of time travel while you're at it, look beyond the saris and you deffinitely get that eighties thing going on

But we went for fabric, braiding, scarves and beaded pumps.

We'll be going here again and again, it really has so much to offer.

We're so lucky it's here in London 5mins from Ealing Broadway on an overground train to Southall.

Come out of the Station and turn right, this is very important.
Head for the High Road, turn left and you'll find Bazzar after Bazzar, shop after shop of all sorts of treasures.
This shop is in the 1st parade of shops across the road from the station.

Everything is a bargain! This fabric is only £7 per metre. Can you believe it........!

Simple vest or tunic or sleeves or scarf or..... or..... or..... I love Southall.
Fake fur, short smooth pile, not the most amazing print quality but ok and even better if you were to put it through a subtle colourd dye and I think it was about £4.00 per metre.

This fabric was £2 per metre and had these 3D little flowers all over. We thought it looked very Vintage and the flowers could be cut out and bonded or maybe pretty puffed sleeves.

These sari suit fabrics are £25 for the set and can be used to make puffed sleeves (will be showing you tutorial for this soon), to go on a simple vest top, simple mini tube skirts or 100s of other things.

Once again still on the opposite side of the Station, there's this 'AMAZING' shop full of braidings, buttons, beads bell things, We truely were in heaven.

These braidings above can be used as they are or for a belt, ,just add some hooks and eyes.

They were £2 per metre and are 2ins wide....wow!...... I love Southall.

These are the more expensive braidings £4-£10 per metre. They keep them behind the counter.

I pretend not to like these!

All of these braidings were between £1-£2 per metre. We'll be using alot of braidings when we start decorating some fake fur winter coats, gives them a great Scandinavion/Tribal/Folklore look.

This photo doesn't do them justice, but these beaded and sequined pumps are lovely and prices are from £5 for kiddies sizes and £10 for adults. We bought a wonderful pair of each for our kids and will show you a better photo later in the next posting.

We might have the name wrong, we went into so many Bazzars got a bit confused, but it's one of the 1st three as you turn left onto the High Road walking from the station.

Scarves.....scarves everywhere between £5-£10 each, man made but feel like wool and cashmere. Don't be put off by the muted colours the good thing about them being man made is that you can put them through a machine dye, We've tweeked the colours a bit to show how they can look.

You see these jewellery shops everywhere in Southall, they're so cheap and great for bangles and very eighties drop earings. Think about using them in another way, maybe joining earings together with other stuff to make an eclectic necklace.


Make a wicked belt by joining several neclaces together. Or wear across brow of head or as a hairband.

These wonderful hairpins were £1 each and are fantastic for when you put your hair up. I've been wearing mine all day today, I love them. Gonna go back and get more.................

The jewellery above and this are from Palika Bazar on the High Street.

There's alot more to be done in Southall but I ran out of time.

We tried to show you less obvious stuff, of course there are loads of amazing saris and indian dress and trouser suits (although Alperton's good for suits) but thought we'd save that for a
pre-summer posting.

When you do go, remember to dress respectfully.

To get there, we went by overground train from Ealing Broadway.

Saturday 24 July 2010

Tutorial 5 - Sew White Vintage Style Top - Part 2

Tutorial 5
White Vintage Style Top - Part 2
Vintage Style white top - Application of frill to puffed sleeve


Part 1 took us to this stage of the Vintage Style top and Part 2 will show us how to apply some georgeous scalloped frills onto the sleeves

1. With the remaining part of the scalloped hem that we cut off the UNI QLO top in Part one, lay out onto an ironing board, lining up the scallops.

Stretch the elastic of the sleeve to see how long the frill should be.

2. Then fold over and press with an iron. Cut off the excess and this gives you the full length of the frill making sure you cut two to this size.


3. Once you have decided how wide you want your frill to be lay the lace on and cut half an inch above for the seam allowannce. Then using a thin strip of Bond-a-Web along top of lace edge press into place. Then using a ZigZag stitch sew along the edge.


Put right sides together and stitch half an inch from the edge, then Zig Zag seam to finish off.


Zig Zag edges to finish off


You should end up with two pieces like this.


4. Put the tube of the frill over the arm of the machine right sides up then line up the seam with the seam on the puffed sleeve.


Once in place, using a Zig Zag stitch go backwards and forwards to hold in the place, then whilst holding the fabric behind the foot with your left hand, stretch the elastic with your right hand to fit the frill and carefully and slowly stitch together.


Really it isn't as difficult as it sounds and it's such a small circumferance that you have to sew, you can really handle it, just take it slowly and always be aware of how much of the frill is left to fit the elastic.


Look how these scalloped frills have transformed the sleeves.
We used a UNI QLO top for this project, but you could 'Upcycle' an old top.

Wednesday 21 July 2010

Tutorial 4 - Sew White Vintage Style Top - Part 1

Tutorial 4
White Vintage Style Top - Part 1
'Vintage Style' top with lace hem and scalloped frill on sleeves.

The technique used to shorten this top can be applied to many other projects giving a totally different look each time.

We took a regular cheap white cotton top from Uni Qlo, ( or you could 'Upcycle' an old top), but felt the length made it look a bit frumpy and that the sleeves could do with a bit of a lift.

Here's how to turn the plain top into a beautiful 'Vintage Style' top.


1. Decide how long you want your top to be.

You can go into the embroidery a little as it will be covered by the lace on the hem later.

It's very important to get the length right.

2. Lay your lace out to decide which type you are going to use.

You can also at this stage, put the piece that you cut off from the scalloped hem, onto the sleeve to see what it will be like.

3. Put the top over the ironing board the right side up and press a small hem upwards (the opposite way to how you normally would turn a hem), about 3mm all round.

4. Lay the lace onto the Bond-a-Web and cut a strip about 2mm narrower than the lace.


You never want the Bond-a-Web to be wider than the lace or trimming, because it's only to hold it in place for sewing and it's a nightmare if ever it gets onto the iron.

Then when cool, peal back the backing paper to reveal the glue.

5. When you 1st start to apply the lace make sure you overlap the side seam, then press into place.

Put a small strip of Bond-a-Web in side seam and press into place.

6. Starting from the side with no opening in the lace, stitch Imm in from hemline all the way round

Then come up the side seam still using a straight stitch and then use a Zig Zag stitch to follow the line of the scallops all the way round the top
Make sure you come down the side seam where the lace is joined to secure in place.

Now you've completed part 1 of your 'Vintage Style' white top.
For part 2 and the application of the scalloped frill onto the sleeves, go to Tutorial 5

Search This Blog

About Me

Seamless with Shaz and Tree will show you how to make one-off, fashionable clothes easily. With Upcycling, sewing shortcuts and step by step tutorials. We'll also be doing trips out to our favourite suppliers and markets. We'll give you the tools to create you very own designer clothes

Followers